Let’s say you’re writing some code locally on your laptop and it’s becoming a bigger project. You’ll want to setup and push your code to a new remote GitHub repository to keep it safe and organized.
I’ve found that if you have both the Git and GitHub CLIs set up already, it’s a very streamlined workflow to create and push to a new repo.
I’ll show you how to do that quickly below.
Prerequisites
- Git CLI installed — Docs for install
- GitHub CLI installed. — Docs for install
- You have credentials on your local machine to create a new repository and push code to it. About authentication to GitHub
FYI My examples are using a Mac.
Step-by-Step Guide
If you already have a project folder with code, skip to Step 2.
Step 1A — If you don’t have a project folder or code yet…
Create a new folder and navigate into it:
mkdir {folder_name}
cd {folder_name}
Example:
mkdir proj-1234
cd proj-1234
Step 1B — If you don’t have a project folder or code yet…
Create a ReadMe file in the folder you just made. It’s empty, but that’s fine for now.
touch README.mdOutput:

Step 2 — Initialize the GitHub repo locally and set the Branch name.
Either in your project folder or in the folder you just created, you’ll want to initialize it as a GitHub repository and also set the branch name.
The branch name can be whatever you want, but a popular term is main. You need the name your branch inorder to push it to a remote.
git init -b mainOutput:

Step 3 — Stage the file(s).
Stage either the new ReadMe or other existing files to be committed. We can use git add . here because it’s the initial commit and we’ll likely want to add all of our files initially.
Use caution when using the git add . in the future, however, since it will stage EVERY FILE in your workspace to be committed. After you have builds, you likely will not want all of your build files committed.
git add .

OR

git add <each_file>
git add file_1
git add file_2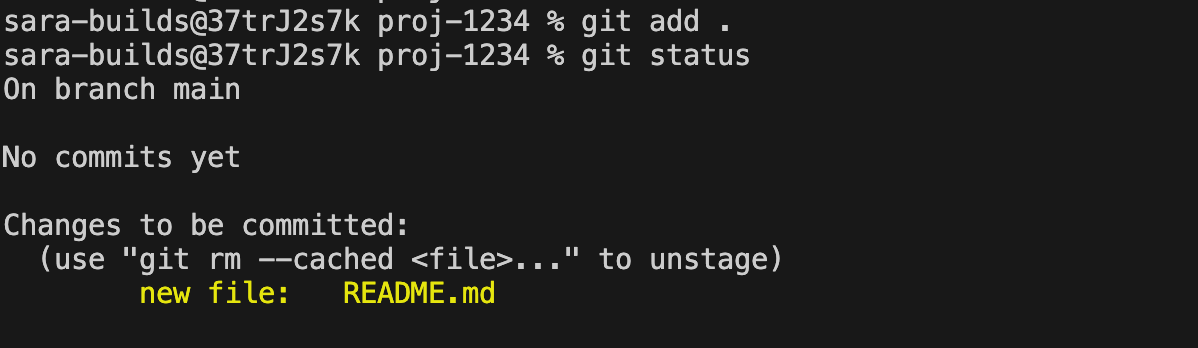
Step 4 — Commit the file(s).
Let’s create a commit with a message for these files.
git commit -m “Initial commit”
Step 5 — Create the Remote GitHub Repository.
Create the GitHub Repository at GitHub.com using the GitHub CLI.
gh repo createThis command will ask you several questions to create the remote repository.
Make sure you choose “Push an existing local repository to GitHub” for the first question asked.
> ? What would you like to do? Push an existing local repository to GitHub
Say Yes to add a remote:
> ? Add a remote? Yes
Say Yes that you want to push the commit you just made:
> ? Would you like to push commits from the current branch to “origin”? Yes
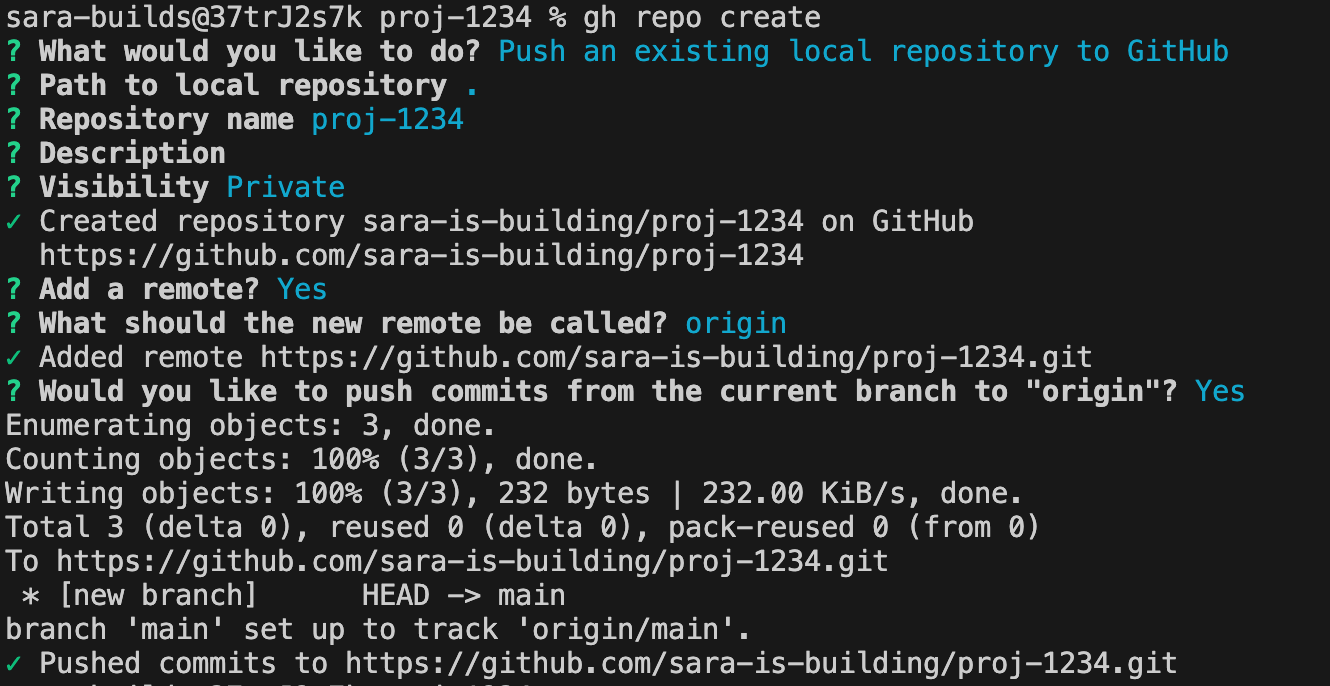
You can now follow the url of the repo you created to see it in your web browser.
Thanks for reading and please give a like if you’d like to hear more from me!
